Nowadays the most important aspect of any accounting or modern POS software should be to have expense management in order to keep the record of your bills either for business or even private expense.

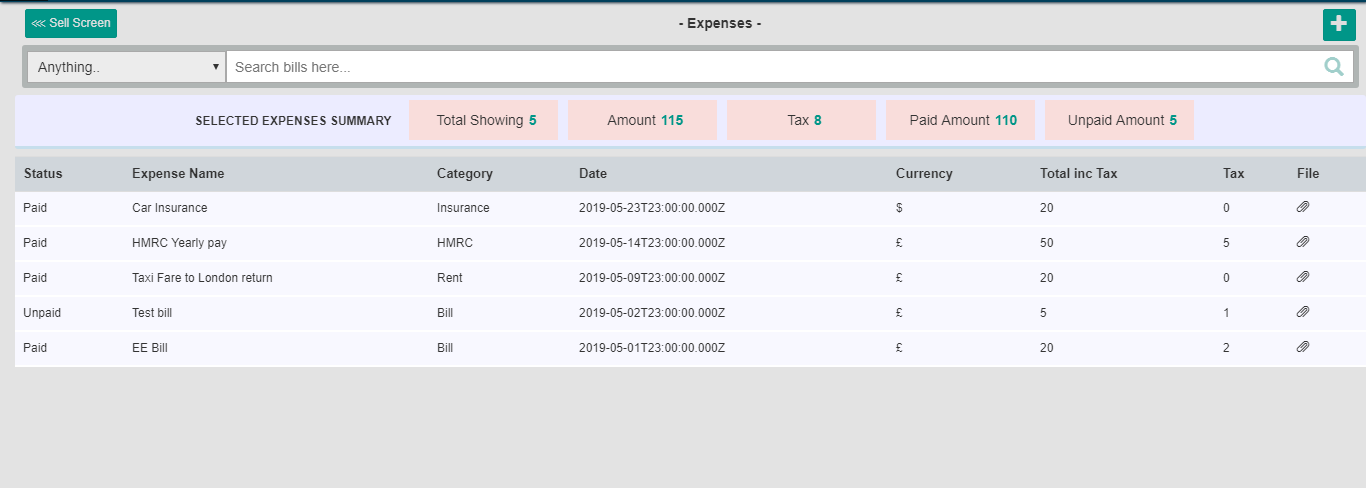
- The above picture shows the list of your added expenses in the POS.
- The highlighted tabs in PINK are the summary of currently viewing expenses on your screen.
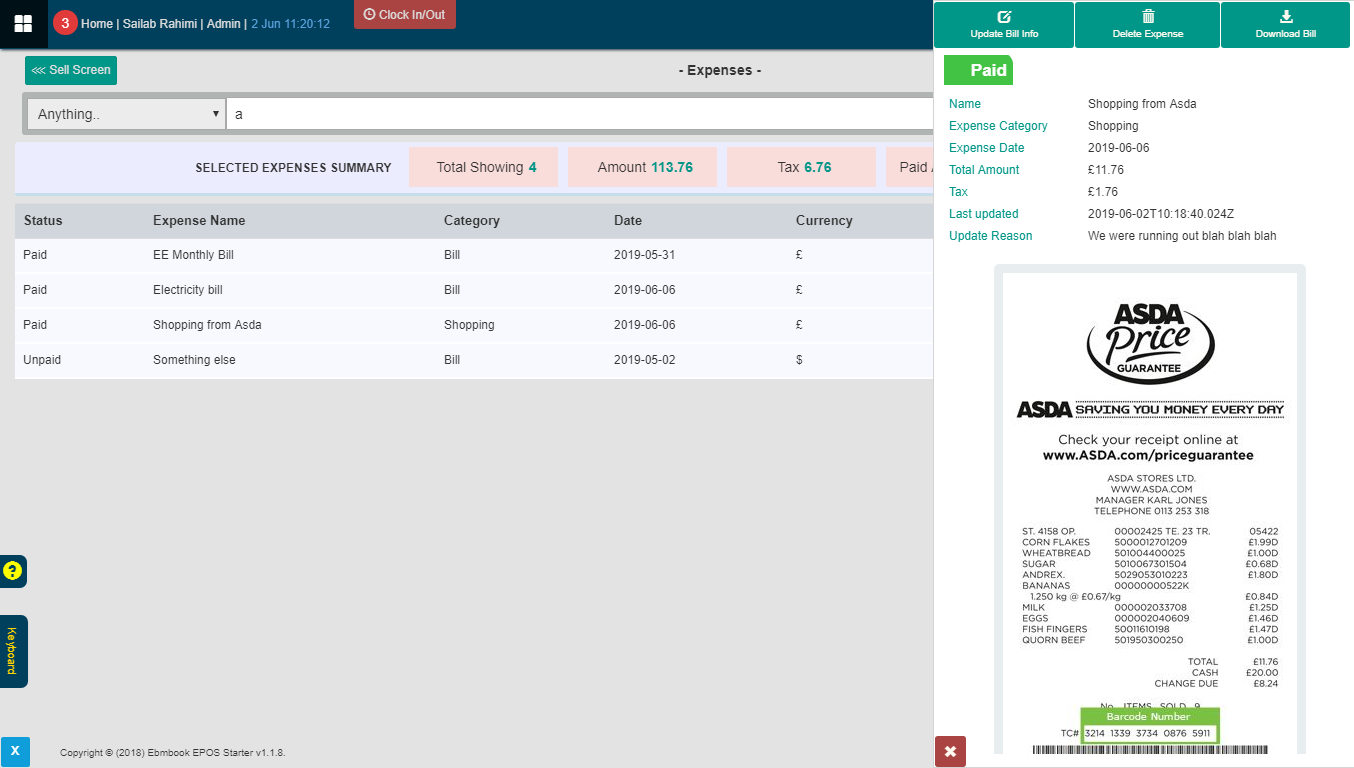
- To view details of the bill, click the relevant row for more details.

- The area on the right shows the details of the selected bill which you have already entered.
- A bill marked in green indicates that this bill has been paid
- A bill marked in red indicates that this bill hasn’t been paid yet. In order to mark the bill PAID, click the “Update Bill Info” button.
Create New Bill
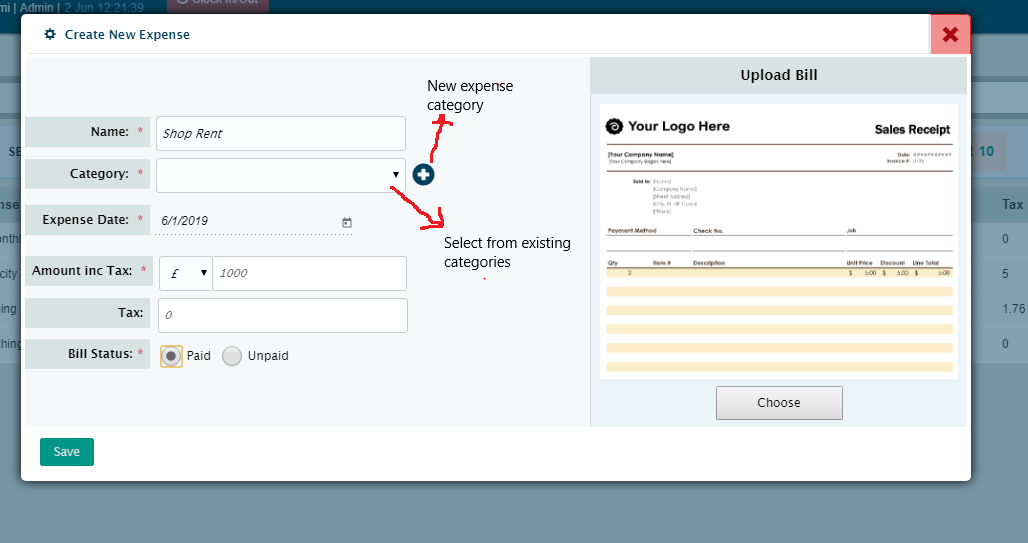
To save your expenses and bills in the POS, click the plus “+” icon on the far right side for a quick form to fill up.

- Most of the details are self-explanatory.
- Category: An expense can have a category in order to organize your bills. For example, a category can be “Rent” and the name section will describe this rent in a bit more details such as Shop Rent, Storage Rent and etc. The plus icon “+” can be used to add a new category if a category has not been entered before.
- Expense Date: this can be either due date, paid date or any date you prefer.
- Bill Status: if the bill has been already paid then should be marked “Paid”.
- Upload Bill: upload the actual bill as a proof to save for later use or leave it blank if there is no bill to upload