How to Customise Printer Receipt Details
This tutorial will help you tailor printer receipts as per your company needs.
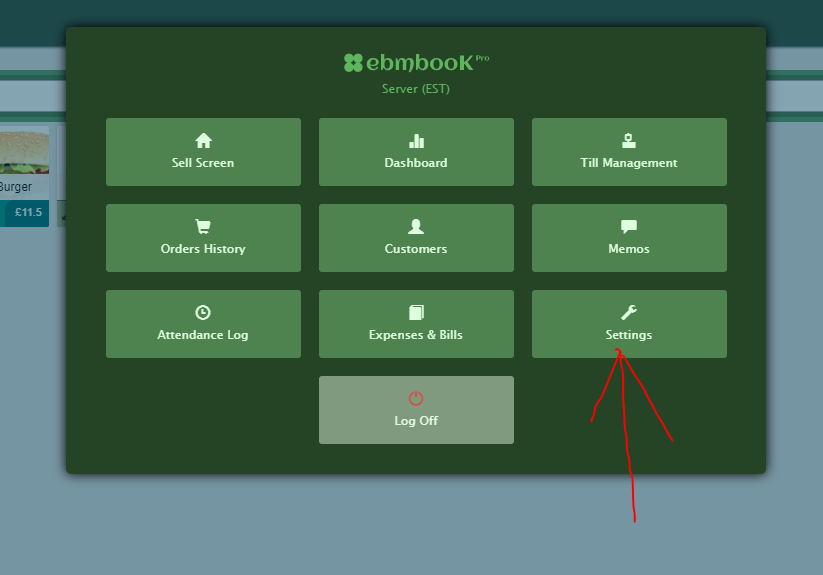
- Settings: Click the top left window icon then the Settings button to open the settings section:
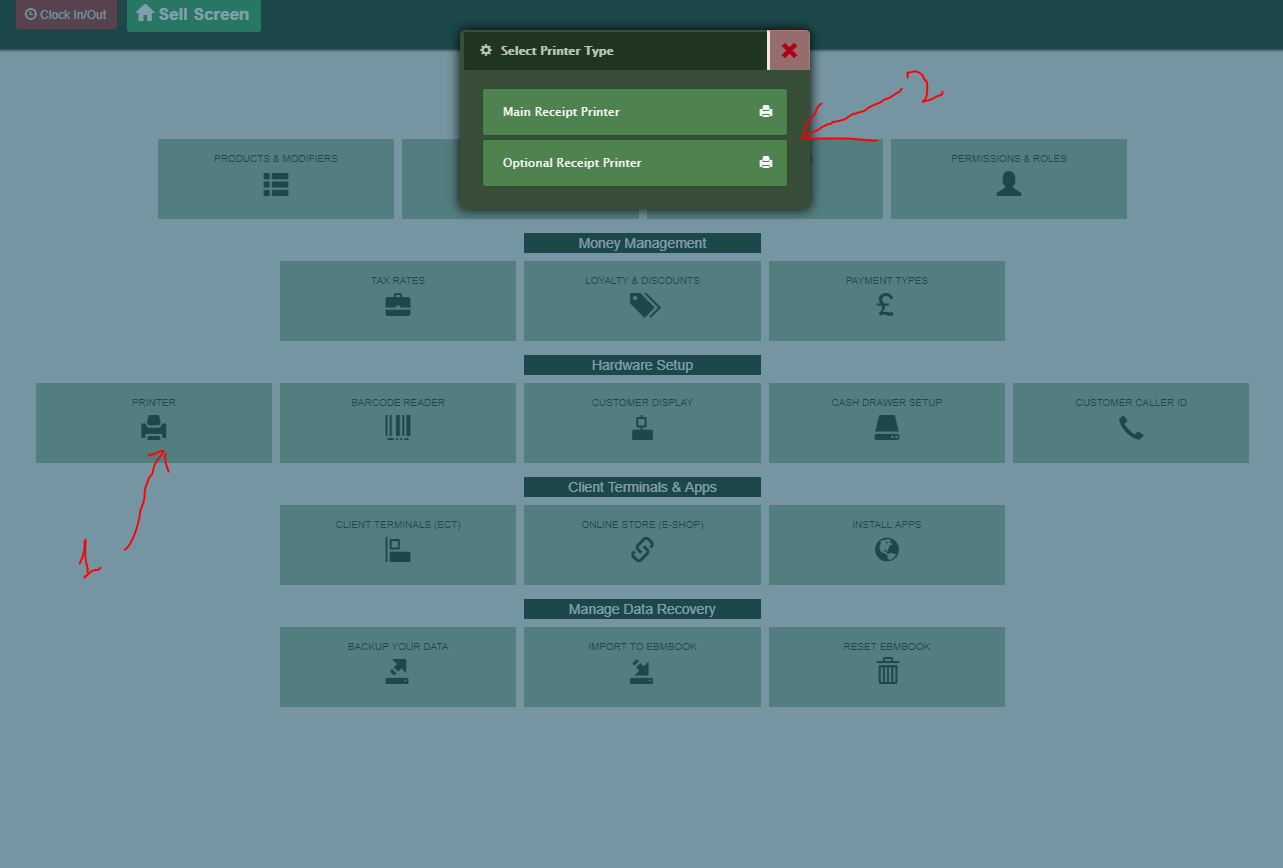
- Printers section: Go into the Printers screen from the Settings menu by clicking the relevant buttons:
In the Printer Setup screen, click the green ‘Customise Your Receipt‘ button in order to begin creating a custom receipt based on the info you want (circled in red):

In the Customise Receipt Contents screen, whatever you check or uncheck from the checklist on the left of the menu will not show up on the receipt on the right. Use this feature to determine how many contents you want on your receipt:

Here is an example of this at work: Say that I don’t want the company name to be displayed. I would tick ‘Company Name’ from the list of options on the left and it would be altered on the right (compare the previous screenshot above with the image below, notice how ‘EBMBOOK‘ is now ‘RECEIPT‘):

Last but not least, you should add a footer. You can add a footer title and footer details (text in the form of a custom message), both of which will be shown at the bottom of the receipt. Click ‘Save Changes‘ (circled in red) to save your custom receipt:

A reminder: This tutorial is written with the notion that you’re accessing the Ebmbook software through a PC or laptop. If you are using a touchscreen terminal, tablet or smartphone, the same directions apply but with your finger instead of the mouse.

